Welcome to the Hampton Bay Ceiling Fan Manual‚ your comprehensive guide for installation‚ operation‚ and maintenance. This manual ensures safe and efficient use of your ceiling fan.
1.1 Overview of the Hampton Bay Ceiling Fan
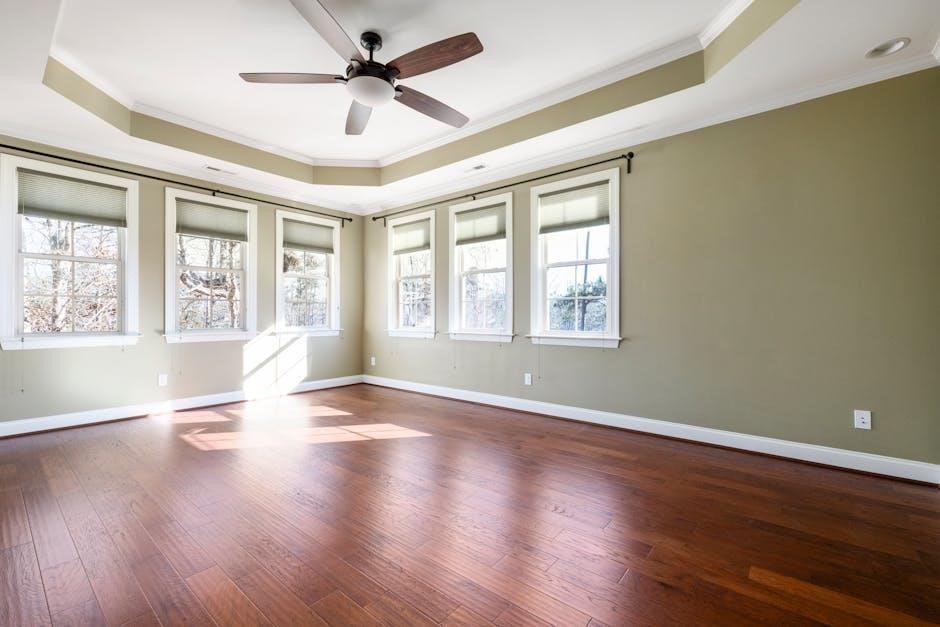
The Hampton Bay Ceiling Fan is a versatile and energy-efficient home appliance designed to enhance airflow and aesthetics. Available in various models like the Hawkins 44 LED and Industrial 60-inch‚ it offers features such as remote control operation‚ adjustable speed settings‚ and optional light kits. Designed for both functionality and style‚ it caters to diverse decor preferences‚ ensuring comfort and convenience for users.
1.2 Importance of Reading the Manual
Reading the Hampton Bay Ceiling Fan manual is essential for safe installation‚ proper operation‚ and troubleshooting. It provides critical information on electrical connections‚ speed settings‚ and maintenance. Understanding the manual ensures optimal performance‚ prevents potential hazards‚ and helps users make the most of their ceiling fan’s features. It also outlines warranty details and customer support options for a seamless experience.
Installation Instructions
Ensure proper wiring by passing 120-volt supply wires through the ceiling hole. Install the mounting plate securely and follow safety guidelines for a stable fan setup.
2.1 Pre-Installation Checklist
- Verify the ceiling can support the fan’s weight using a sturdy outlet box or installation hanger bar.
- Ensure the power is off at the circuit breaker before starting installation.
- Gather all tools and parts‚ including screws‚ mounting hardware‚ and the remote control.
- Check local electrical codes and regulations for compliance.
- Measure and mark the ceiling for accurate fan placement.
- Ensure proper ventilation and clear the area around the installation site.
2.2 Step-by-Step Installation Guide
Begin by mounting the fan to the outlet box using the provided screws. Secure the fan tightly to ensure stability. Next‚ attach the fan blades to the motor hub‚ ensuring they are evenly spaced. Connect the wiring according to the diagram‚ matching black‚ white‚ and copper wires. Finally‚ install the light kit and remote control receiver‚ following the manual’s detailed instructions. Refer to the manual for specific wiring and assembly details.
2.3 Mounting the Fan to the Outlet Box
Ensure the power is off before starting. Pass the 120-volt supply wires through the ceiling hole and secure the mounting plate to the outlet box. Align the fan’s mounting bracket with the plate and tighten the screws firmly. Ensure the fan is level and stable. If installing on a sloped ceiling‚ use the provided adapter. Double-check all connections for safety and proper alignment to prevent wobbling during operation.

Operating the Ceiling Fan
Operating your Hampton Bay Ceiling Fan is straightforward. Adjust speed using the pull chain or remote‚ control light settings‚ and change fan direction for seasonal efficiency. Ensure proper function by following remote control instructions and maintaining a stable power supply.
3.1 Understanding the Remote Control Functions
The remote control for your Hampton Bay Ceiling Fan offers precise operation. It allows you to adjust fan speed‚ toggle the light kit‚ and set timers or thermostat modes. Use the buttons to cycle through speed settings‚ dim lights‚ or activate energy-saving features. Ensure the remote has a clear line of sight to the receiver and batteries are installed correctly for optimal performance. Refer to the troubleshooting section if issues arise.
3.2 Using the Pull Chain to Adjust Speed
The pull chain on your Hampton Bay Ceiling Fan allows manual speed adjustment. Pulling the chain once sets it to high speed‚ twice for medium‚ and three times for low. A fourth pull turns the fan off. This feature provides quick control without using the remote‚ ensuring smooth operation in any setting. Always ensure the chain is securely attached to avoid malfunction.
3;3 Setting Up the Timer and Thermostat
To set up the timer and thermostat on your Hampton Bay Ceiling Fan‚ use the remote control to access these features. Press the timer button to select the desired duration‚ then adjust the thermostat to your preferred temperature. The fan will automatically regulate its speed to maintain the set temperature‚ optimizing energy efficiency and comfort. Ensure the remote is paired correctly for smooth operation.

Troubleshooting Common Issues
Troubleshooting common issues with your Hampton Bay Ceiling Fan? This section helps resolve electrical connection problems‚ wobbling‚ and remote control malfunctions. Refer to the manual for detailed solutions.
4.1 Diagnosing Electrical Connection Problems
Diagnosing electrical issues with your Hampton Bay Ceiling Fan? Check for loose wire connections or incorrect voltage setup. Ensure the black wire is connected for 220V models. Verify the isolating wall switch is installed to prevent shock risks. Consult the wiring diagram in the manual for proper connections. If unsure‚ contact a licensed electrician for assistance.
4.2 Fixing Wobbling or Noisy Operation
To address wobbling or noise‚ ensure all motor housing screws are snug and the fan blade brackets are tightly secured. Check for loose blades or uneven balancing. Lubricate moving parts if necessary. If noise persists‚ inspect for debris or misaligned components. Refer to the manual for blade balancing instructions to ensure smooth operation and minimize vibrations.
4.3 Resetting the Remote Control
To reset the remote control‚ remove the battery cover and press and hold the reset button for 10 seconds. Replace the cover and test the remote. If issues persist‚ ensure the remote is properly paired with the fan. Refer to the manual for pairing instructions or contact Hampton Bay support for further assistance. This process ensures optimal remote functionality and resolves connectivity issues.

Maintenance and Care Tips
Regularly clean fan blades and housing to prevent dust buildup. Lubricate moving parts annually for smooth operation. Replace light bulbs and kits as needed for optimal performance.
5.1 Cleaning the Fan Blades and Housing
Regular cleaning prevents dust buildup and ensures optimal performance. Turn off the fan and lights. Use a soft‚ dry cloth to wipe blades and housing. For stubborn dirt‚ dampen the cloth with mild detergent. Avoid harsh chemicals or abrasive materials. Clean light kits and bulbs separately‚ following manufacturer guidelines. Ensure all parts are dry before restarting the fan to maintain efficiency and longevity.
5.2 Lubricating Moving Parts
Regular lubrication ensures smooth operation and reduces wear on moving parts. Apply a small amount of silicone-based lubricant to the fan motor and any visible moving components. Avoid using heavy oils‚ as they may attract dust. Turn off the power before lubricating to ensure safety and effectiveness. This maintenance step helps maintain quiet operation and extends the lifespan of your ceiling fan.
5.3 Replacing Light Kits and Bulbs
To replace light kits or bulbs‚ first ensure the power is off at the circuit breaker. For light kits‚ refer to the manual for compatible models. Remove the glass cover or shade‚ then detach the old kit or bulb. Install the new one securely‚ ensuring proper connections. For bulbs‚ use LED or halogen options as specified. Regular replacement maintains brightness and energy efficiency‚ while proper installation ensures safety and optimal performance.
Technical Specifications
Hampton Bay ceiling fans operate on 120V AC power‚ featuring high-efficiency motors and durable blade designs. Dimensions and weight vary by model‚ ensuring compatibility with various spaces.
6.1 Voltage and Wiring Requirements
Hampton Bay ceiling fans require a 120V AC power supply. The black wire connects to the fan motor‚ while the white wire is neutral. Ensure proper grounding for safety. Compatible with 110V or 220V systems‚ though 120V is standard. Use 12-gauge or 14-gauge wiring for reliable operation. Always turn off power before installation. Grounding the fixture is essential to prevent electric shock. Consult a licensed electrician for 220V setups.
6.2 Fan Motor and Blade Details
Hampton Bay ceiling fans feature durable motors designed for smooth operation. Blades are crafted from high-quality materials‚ ensuring balance and airflow efficiency. The 54-inch and 60-inch models offer optimal coverage. Motors are built for quiet performance and long lifespan. Blades are reversible‚ allowing for seasonal airflow adjustments. The fan’s design ensures minimal vibration and maximum energy efficiency. Proper blade installation is crucial for optimal performance and safety.
6.4 Weight and Dimension Guidelines
Hampton Bay ceiling fans vary in weight and size depending on the model. The 54-inch fan typically weighs between 20-25 pounds‚ while the 60-inch model ranges from 25-30 pounds. Dimensions include a blade span of 54 or 60 inches and a low-profile design. These specifications ensure proper fit and installation‚ optimizing airflow and efficiency. Always refer to the manual for exact measurements to ensure safe and correct installation.
Safety Precautions
Ensure safe installation and operation by following guidelines to avoid electric shock. Use isolating wall switches and comply with local electrical codes for optimal safety.
7.1 Warning: Avoiding Electric Shock Risks
To reduce the risk of electric shock‚ ensure the power is turned off at the electrical panel before installation or maintenance. Use an isolating wall switch and avoid handling electrical components in wet conditions. Always follow local electrical codes and manufacturer guidelines for safe wiring practices.
7.2 Caution: Proper Installation Practices
Ensure the ceiling fan is installed securely using a sturdy mounting bracket to prevent wobbling. Verify all screws and electrical connections are tight and correctly wired. Avoid overloading the outlet box and always follow local building codes. Use a qualified electrician if unsure. Proper installation ensures safety‚ efficiency‚ and optimal performance of your Hampton Bay ceiling fan.
7.3 Note: Compliance with Local Regulations
Ensure your Hampton Bay ceiling fan installation complies with local electrical codes and regulations. Verify voltage requirements and use approved wiring materials. Always follow regional safety standards to avoid hazards. Compliance ensures proper function‚ safety‚ and warranty validity. Consult local authorities or a licensed electrician if unsure about specific requirements in your area.
Warranty and Customer Support
Hampton Bay provides a one-year warranty on ceiling fans‚ covering parts and labor. Contact customer support at 1-877-527-0313 or visit hamptonbay.com for assistance.
8.1 Understanding the Warranty Coverage
Hampton Bay ceiling fans come with a one-year limited warranty covering parts and labor. The warranty applies to defects in materials and workmanship under normal use. Proper installation and registration may be required. Damage from misuse‚ improper installation‚ or alterations is not covered. For full terms and conditions‚ refer to the manual or visit hamptonbay.com.
8.2 Contacting Hampton Bay Customer Service
For assistance‚ contact Hampton Bay Customer Service at 1-877-527-0313‚ available Monday-Friday from 8 a.m. to 6 p.m. EST. Visit hamptonbay.com for support resources or to submit inquiries. Have your product model number ready for faster service. The team is ready to help with installation‚ troubleshooting‚ or warranty-related questions to ensure optimal performance of your ceiling fan.
8.3 Online Resources for Troubleshooting
Visit Hampton Bay’s official website at hamptonbay.com for exclusive online resources‚ including downloadable PDF manuals and troubleshooting guides. Explore detailed wiring diagrams‚ FAQs‚ and video tutorials to resolve common issues. Access the support section for step-by-step solutions and user forums. These resources empower you to diagnose and fix problems independently‚ ensuring your ceiling fan operates efficiently all year round.
Advanced Features
Discover advanced features like smart home integration‚ energy-saving modes‚ and customizable speed settings. These innovations enhance functionality‚ offering seamless control and optimized performance for your ceiling fan.
9.1 Smart Home Integration Options
The Hampton Bay Ceiling Fan supports smart home integration‚ allowing seamless control through compatible systems like Samsung SmartThings or Apple HomeKit. Use voice commands with Alexa or Google Assistant for convenient operation. This feature enables remote access‚ scheduling‚ and energy monitoring via smartphone apps‚ enhancing your smart home experience. Ensure your fan has a Wi-Fi module for connectivity and check compatibility with your specific model.
9.2 Energy Efficiency Settings
The Hampton Bay Ceiling Fan offers energy efficiency settings to optimize power consumption. Use the Eco-mode to reduce energy use during mild weather. Programmable timers and smart sensors adjust operation based on room occupancy and temperature. These features help lower utility bills while maintaining comfort. Refer to your manual for specific settings and customization options to maximize energy savings.
9.3 Customizing Fan Speed and Light Settings
Customize your Hampton Bay Ceiling Fan’s speed and light settings using the remote control or pull chain. Adjust fan speed with three settings: high‚ medium‚ and low. Dim or brighten lights to suit your needs. Program timers to automate operations‚ ensuring energy efficiency. For enhanced control‚ use the thermostat to regulate airflow based on room temperature‚ optimizing comfort and energy use seamlessly.
Thank you for purchasing the Hampton Bay Ceiling Fan. Proper use and maintenance ensure optimal performance. For questions‚ contact our customer service team for assistance and support.
10.1 Final Tips for Optimal Performance
Regularly clean fan blades to maintain airflow efficiency. Ensure all screws are tightened to prevent wobbling. Use the remote control or pull chain to adjust settings smoothly. Replace light bulbs as needed to maintain brightness. For optimal performance‚ follow the maintenance schedule outlined in this manual.
Additionally‚ ensure proper ventilation in the room and avoid exposing the fan to extreme temperatures. Refer to the troubleshooting section if issues arise. Contact Hampton Bay customer support for any further assistance or queries.
10.2 Encouraging User Feedback
Your feedback is invaluable! Share your experiences with the Hampton Bay Ceiling Fan to help us improve. Visit HAMPTONBAY.COM to submit reviews or contact customer service at 1-877-527-0313. Your insights assist in enhancing product quality and user satisfaction. Thank you for being a valued customer and contributing to our continuous improvement journey.