The iHome Clock Radio combines innovative technology with classic design, offering high-quality sound and convenient features to enhance your daily routine. A perfect blend of modern functionality and timeless style.
1.1 Product Overview
The iHome Clock Radio is a versatile device designed to integrate seamlessly into your daily routine. It combines a traditional clock radio with modern features like Bluetooth connectivity, FM radio, and USB charging ports. The device often includes a vibrant LED display, multiple alarm settings, and customizable color modes to suit your preferences. Many models feature wireless charging pads, ensuring your smartphone stays powered without cluttering your space. With its sleek design and compact build, the iHome Clock Radio is perfect for bedrooms, offices, or any setting where you want to stay connected and organized. Its user-friendly interface and advanced functionalities make it a practical and stylish addition to your home. Whether you’re waking up to your favorite FM station or streaming music via Bluetooth, this device offers a blend of convenience and entertainment.
1.2 Key Features
The iHome Clock Radio boasts an array of features that enhance its functionality. It includes a digital tuner for clear FM radio reception, allowing users to preset up to 6 favorite stations for quick access. The device also supports Bluetooth connectivity, enabling seamless audio streaming from compatible devices. A USB charging port is integrated, providing a convenient way to charge smartphones or tablets. Many models feature wireless charging, eliminating the need for cables. The clock radio also offers adjustable brightness and color modes, allowing users to customize the display to their liking. Additionally, it includes a speakerphone function for hands-free calls and a snooze feature for added convenience. These features make the iHome Clock Radio a versatile and practical addition to any room, blending traditional radio functionality with modern smart technology.
Unboxing and Accessories
The iHome Clock Radio comes neatly packaged with essential accessories, including the clock radio itself, a universal power adapter, and a detailed user manual for easy setup.
2.1 What’s Included in the Box

Inside the box, you’ll find the iHome Clock Radio unit, a universal power adapter, and a comprehensive user manual. The device itself features a sleek design with a high-quality display and intuitive controls. Additionally, some models may include a remote control for convenient operation. The power adapter ensures safe and reliable charging, while the manual provides detailed instructions for setup, feature exploration, and troubleshooting. Everything you need to get started is included, making the unboxing experience straightforward and hassle-free. The packaging is designed to protect the device during shipping, ensuring it arrives in perfect condition. With all essentials provided, you can immediately begin enjoying the clock radio’s advanced features and functionalities.
2.2 First Impressions and Physical Overview
The iHome Clock Radio makes a strong first impression with its sleek, modern design and compact footprint. The device features a high-resolution display that clearly shows time, alarms, and radio information. The controls are intuitively laid out, with buttons for adjusting volume, setting alarms, and navigating FM stations. The build quality feels sturdy, with a smooth, matte finish that complements any bedroom or office decor. The inclusion of a USB charging port adds convenience for charging smartphones or other devices. Some models also offer vibrant color modes, enhancing the visual appeal. Overall, the clock radio exudes a sense of durability and style, making it a practical and attractive addition to any space. Its user-friendly design ensures easy operation right out of the box.

Setting Up the Clock
Press and hold the Time Set/Sleep Button until the display flashes, then adjust the time using the “+” or “-” buttons for accurate clock setup.
3.1 Initial Setup
Begin by plugging in the clock radio using the provided AC adapter. Press and hold the Time Set/Sleep Button for 2 seconds until the display flashes and a beep sounds. Use the “+” or “-” buttons to set the current time. The clock may automatically update, but if not, manually adjust the time zone and date as needed. Ensure the device is properly powered to avoid losing settings during battery replacement. Refer to the user manual for detailed instructions and troubleshooting tips to ensure a smooth setup process.
3.2 Time Zone Adjustment
To adjust the time zone on your iHome Clock Radio, press and hold the Time Zone Button until the current zone flashes on the display. Use the “+” or “-” buttons to cycle through available time zones. Once your desired zone is displayed, release the button to save the setting. Ensure the clock is properly powered during this process to avoid losing settings. Some models may automatically update the time based on the selected zone, while others may require manual adjustment. Refer to your user manual for specific instructions tailored to your device. Proper time zone setup ensures accurate timekeeping and alarm functionality. This step is crucial for maintaining synchronization with your local time.
Using the Radio Function
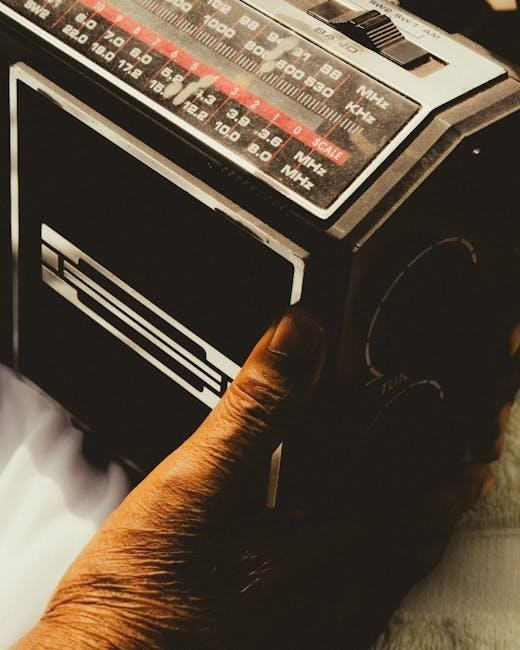
The iHome Clock Radio allows you to tune into your favorite FM stations with clear sound quality. Simply press the FM button, adjust the dial, and enjoy. You can also preset stations for quick access. Some models support wireless streaming via Bluetooth, enhancing your listening experience. Ensure proper antenna positioning for optimal reception. The radio function complements the alarm and clock features, making it a versatile addition to your daily routine. Always refer to the user manual for specific instructions on operating the radio function effectively. This feature ensures you stay connected to your favorite music and shows effortlessly.
4.1 FM Radio Basics
The iHome Clock Radio features an FM radio function, allowing you to tune into your favorite stations with clear sound quality. To use the FM radio, press the FM button and adjust the dial to find your desired station. Some models include a digital tuner for precise station selection. For optimal reception, ensure the antenna is positioned correctly. You can also preset up to 6 stations for quick access. To preset a station, tune to the desired frequency, then press and hold the preset button until it saves. The FM radio function is a great way to enjoy live music, news, and shows without needing external devices. Refer to your user manual for specific instructions on operating the FM radio feature effectively. This ensures you can fully utilize the radio capabilities of your iHome Clock Radio.
4.2 Presetting Stations
Presetting your favorite FM stations on the iHome Clock Radio is a convenient way to access them quickly. To preset a station, tune to the desired frequency using the dial or buttons. Once the station is playing clearly, press and hold the preset button (usually numbered 1-6) until it saves. Some models allow up to 6 preset stations. To recall a preset station, simply press the corresponding preset button. This feature ensures easy access to your favorite FM stations without manual tuning each time. For detailed steps, refer to your user manual, as the process may vary slightly between models. Presetting stations enhances your listening experience, making it seamless to enjoy your preferred radio content.
Alarm Features
The iHome Clock Radio offers dual alarms, allowing you to set two different wake-up times. Use the snooze function for extra sleep, and rely on the battery backup to keep alarms active during power outages. The manual provides detailed steps for setting and managing alarms efficiently.
5.1 Setting Alarms
To set an alarm on your iHome Clock Radio, press and hold the Time Set/Sleep button until the display flashes. Use the + or – buttons to adjust the alarm time. You can choose to wake up to an FM radio station, Bluetooth audio, or a traditional beep. For dual alarms, repeat the process to set a second wake-up time. The Snooze function allows you to pause the alarm temporarily. Ensure the battery backup is enabled to maintain alarm settings during power outages. Refer to the manual for detailed steps to customize your wake-up experience and manage multiple alarms efficiently.
5.2 Using the Snooze Function
The Snooze function on your iHome Clock Radio allows you to temporarily pause the alarm. Press the Snooze button to silence the alarm for a set duration, typically 10 minutes. This feature is ideal for those needing a few extra minutes of rest. The snooze function works for both alarms in dual-alarm models. To deactivate the snooze, press the Alarm Off button or wait for the snooze period to end. Ensure the alarm is properly set to use this feature effectively. The snooze function is a convenient way to manage your wake-up routine without disabling the alarm entirely. Refer to the manual for specific instructions on adjusting snooze settings or disabling it if needed.
Bluetooth Connectivity
Experience wireless audio streaming with the iHome Clock Radio. Pair your Bluetooth devices effortlessly, with a clear indicator showing connection status. Enjoy seamless music playback and hands-free calls.
6.1 Pairing Bluetooth Devices
To pair your Bluetooth device with the iHome Clock Radio, ensure Bluetooth is enabled on your device. Select the iHome model from the available options. The Bluetooth indicator will light up when connected. Ensure your device is within range for a stable connection. If pairing fails, reset your iHome by unplugging and replugging it. Follow these steps for a seamless setup.
6.2 Troubleshooting Bluetooth
If you encounter Bluetooth issues with your iHome Clock Radio, start by resetting the device. Unplug it, wait 10 seconds, and replug it. Ensure your device is within range and Bluetooth is enabled. If pairing fails, restart both devices. Check for interference from other wireless devices. If issues persist, perform a factory reset. Ensure your iHome has the latest firmware. If problems continue, contact customer support. These steps should resolve most connectivity problems and restore smooth Bluetooth functionality.

USB Charging Port
The 5W USB port allows convenient charging of your devices. It features built-in safety protections to prevent overheating and ensure reliable charging performance.
7.1 Charging Your Devices
The USB charging port on your iHome Clock Radio provides a convenient way to charge your devices. With a 5W output, it supports efficient charging for smartphones, tablets, and other compatible devices. Simply plug your device into the USB port using your standard charging cable. The port is designed with safety features to prevent overheating and ensure reliable performance. It’s ideal for charging your phone overnight while using the alarm function. Ensure your device is compatible with the USB port’s power output for optimal charging. For more detailed instructions, refer to the user manual or the manufacturer’s guidelines. This feature adds versatility to your clock radio, making it a practical addition to your bedside setup.
7.2 USB Port Safety
The USB charging port on your iHome Clock Radio is designed with safety in mind. To ensure safe operation, avoid using damaged cables or adapters, as they may cause overheating or malfunction. Always use the original cable provided with your device or a high-quality, compatible alternative. Keep the USB port clean and dry to prevent damage from moisture or debris. If you notice any unusual behavior, such as excessive heat or flickering, unplug the device immediately. For optimal performance, ensure your device is compatible with the USB port’s power output. Regularly inspect the port and cable for wear and tear. Follow these guidelines to maintain safety and extend the lifespan of your iHome Clock Radio’s USB charging feature.
Customizing Your iHome Clock Radio
Customize your iHome Clock Radio with adjustable brightness and vibrant color modes to match your preferences. The LED display offers a modern aesthetic, enhancing your daily experience with personalized settings.
8.1 Brightness Adjustment
The iHome Clock Radio allows you to adjust the display brightness to suit your preferences. Press the Dimmer Button to cycle through multiple brightness levels, ensuring optimal visibility in any lighting condition. This feature is especially useful for bedtime, as it helps reduce glare without fully dimming the display. The adjustable brightness ensures the clock remains functional while maintaining a comfortable environment. By customizing the brightness, you can enhance your overall user experience and ensure the device seamlessly integrates into your daily routine. This feature is part of the broader customization options available, making the iHome Clock Radio a versatile and user-friendly device.
8.2 Color Modes
The iHome Clock Radio offers a variety of color modes to personalize your experience. With up to 11 LED color modes, you can choose from vibrant hues to match your mood or room decor. To cycle through the colors, press the Color Mode Button until your preferred color is displayed. This feature is particularly popular in models like the iHome iBTW112, which supports wireless charging and USB ports. The color modes add a stylish touch, making the device not only functional but also visually appealing. You can enjoy a dynamic display that enhances your daily routine, whether it’s waking up to a soothing color or creating a relaxing ambiance in the evening. This customization option ensures your iHome Clock Radio stands out as a versatile and modern accessory.

Advanced Features
The iHome Clock Radio boasts advanced features like wireless charging and a built-in speakerphone, enhancing convenience and functionality for a seamless user experience.
9.1 Wireless Charging
The iHome Clock Radio features wireless charging, allowing you to charge compatible devices without cables. Simply place your smartphone or other Qi-enabled devices on the charging pad. Ensure proper alignment for optimal charging. This feature adds convenience, eliminating the need for tangled wires. The wireless charging function is energy-efficient and supports fast charging for compatible devices. Always ensure the clock radio is plugged into a power source to activate wireless charging. Refer to your device’s compatibility list to confirm Qi support. Keep the charging area clean and free from metal objects to maintain performance. Wireless charging is a modern, hassle-free way to keep your devices powered.
9.2 Speakerphone Function
The iHome Clock Radio includes a built-in speakerphone function, enabling hands-free calls via Bluetooth. Once paired, incoming calls can be answered directly from the clock radio. The microphone ensures clear voice capture, while the speaker delivers crisp audio. This feature is ideal for convenient communication without needing to pick up your device. To use the speakerphone, ensure your device is connected via Bluetooth and accept calls using the clock radio’s controls. Volume can be adjusted for optimal call quality. If issues arise, such as poor audio or dropped calls, restart the Bluetooth connection or check for firmware updates. The speakerphone function enhances multitasking, allowing you to manage calls while performing other tasks. It’s a practical addition for a seamless user experience.
Maintenance and Care
Regularly clean the device with a soft cloth to prevent dust buildup. Avoid harsh chemicals and ensure the USB port remains dry for optimal performance. Refer to the manual for detailed cleaning and safety guidelines.
10.1 Cleaning the Device
Regular cleaning ensures optimal performance and longevity of your iHome Clock Radio. Use a soft, dry cloth to gently wipe the display and exterior surfaces. For tougher stains, lightly dampen the cloth with water, but avoid moisture entering the device. Never use harsh chemicals, abrasive cleaners, or aerosol sprays, as they may damage the finish or harm electronic components. Clean the USB port with a dry cotton swab to remove dust or debris. Avoid submerging the device in water or exposing it to excessive humidity. For stubborn stains on the speaker grille, use a soft-bristle brush to gently remove particles. Always unplug the device before cleaning and ensure it is completely dry before plugging it back in. Refer to the manual for additional care tips.
10.2 Battery Replacement
Replace the batteries in your iHome Clock Radio to maintain its functionality. Use a CR2032 lithium battery or equivalent. Ensure the device is unplugged before replacing batteries to avoid data loss. Open the battery compartment, typically located on the back or bottom, by sliding it open or using a small screwdriver. Remove the old batteries and insert the new ones, matching the polarity signs. Avoid mixing old and new batteries to prevent damage. If your model has a battery backup system, this ensures the clock settings are retained during power outages. Never use damaged or low-quality batteries, as they may leak or cause malfunction. After replacing, close the compartment securely. For rechargeable models, refer to the manual for charging instructions. Proper battery care extends the life of your device.

Troubleshooting Common Issues
Address issues like the clock not updating by checking the power source and time zone settings. For radio static, ensure the antenna is positioned correctly. Resetting the device often resolves connectivity problems. Refer to the manual for detailed solutions.
11.1 Clock Not Updating
If the clock fails to update, ensure the device is properly plugged into a power source. Check the time zone settings to confirm they are correct for your location. Press and hold the Time Set/Sleep Button for 2 seconds to sync the clock. If issues persist, perform a factory reset by pressing and holding the reset button with a pin. This will restore default settings and often resolve synchronization problems. For further assistance, refer to the user manual or contact customer support. Regularly updating your clock ensures accurate timekeeping and proper alarm functionality. Always verify the power supply and settings before troubleshooting.
11.2 Radio Static
Experiencing static on your iHome Clock Radio can be frustrating. To resolve this, first, ensure the antenna is fully extended and positioned for optimal reception. Move the device away from electronic devices that may cause interference. Check if the issue occurs on all stations or specific ones; weak signals often cause static. If using FM radio, ensure you are tuned to the correct frequency. Try presetting stations for better clarity. If static persists, reset the device by unplugging it, waiting 10 seconds, and plugging it back in. For severe cases, perform a factory reset. Refer to the user manual for detailed steps. Proper adjustment and placement can significantly improve radio quality. Contact customer support if issues remain unresolved.
Resetting the Device
To reset your iHome Clock Radio, press and hold the Reset Button located at the back or bottom of the device for 5-10 seconds until it restarts. This restores default settings, resolving most software issues. Ensure the device is unplugged before resetting if instructed in the manual. After resetting, reconfigure your settings and alarms. This process does not affect hardware functionality but clears custom preferences. Contact support if problems persist. Always refer to the user manual for specific reset instructions for your model. Resetting is a quick solution for troubleshooting common issues.

12.1 Factory Reset
A factory reset restores your iHome Clock Radio to its original settings, erasing all custom configurations. To perform a factory reset, locate the small Reset Button on the device’s back or bottom. Use a pin or small object to press and hold this button for 5-10 seconds until the display flashes or a beep sounds. Release the button, and the device will restart, reverting to default settings. This process does not affect hardware functionality but clears all alarms, radio presets, and brightness adjustments. After resetting, you will need to reconfigure your settings. If you encounter issues, consult the user manual for specific instructions, as reset procedures may vary slightly by model. A factory reset is a useful troubleshooting step for resolving persistent software issues. Always back up your settings before performing a reset.
12.2 Restoring Default Settings
Restoring default settings on your iHome Clock Radio allows you to revert to the original configuration without performing a full factory reset. This is useful for troubleshooting or personal preference. To restore default settings, navigate to the Menu using the control buttons. Select the Settings or System option, then choose Restore Defaults. Confirm your selection, and the device will reset to its original settings. Note that this process may vary slightly depending on your model. For detailed instructions, refer to your user manual. Restoring default settings does not erase alarms or radio presets, making it a safer option than a factory reset. This feature is ideal for resolving software glitches while preserving your custom configurations. Always ensure the device is powered on and connected to a power source during this process.